Thursday, March 30, 2006

Metal & wood

Well, I'm making slow & steady progress. Since the last post, I have spent a lot of time gluing and clamping. I re-glued the missing piece of veneer on the front arch, and it looks pretty decent. I finished stripping the front arch, and I removed the damaged veneer from the middle-front panel. Once the veneer came off, it became apparent that there was some damage to the speaker grille. I wound up removing chunks of the wood, and reglueing them. It looks a lot better now, and everything is much tighter and more solid. I do still need to replace some missing veneer on the outer backside of the front arch, but I think I can salvage some veneer from elsewhere to use for that. The veneer that came off is very thin and brittle. I think it will only be useful for patching small areas. I did strip the lacquer off though.

Here's a picture after patching the veneer. It actually looks better now, since I stripped the lacquer off of the patch. I still need to use wood filler to fill some small areas, and then stain them to match. I sure hope I can make them match well.


Before I can start re-assembling the cabinet, I need to get over to Harbor Freight and pick up some more clamps. They have pipe-clamps for $4 that I think will work really well (the same kind of clamps are like $12 each at Lowes). I already have one of these, but I want 2 more. I bought the pipe, now I just need the clamps.

Once I get the cabinet back together, I want to try staining the body to see if it will be acceptable. If not, then I'll need to order some veneer.

Meanwhile I've been working on the metal parts. I used naval jelly to remove the rust from the tube shield. This was nerve-wracking, because I'm trying not to damage the paper labels. I mostly succeeded in this.


I also repainted the transformer housing with some black Krylon I had laying around. This came out really nice - maybe too nice. I may knock down the gloss with some steel wool later.

Last night I painted the speaker basket with some medium gray Rustoleum:


The color match was good, and it looks nice. I'll probably want to knock down the gloss there too. I still need to paint the inside of the basket and then repaint the audio transformer black. I think I'm going to leave the magnet housing alone. I don't think it will look good painted.

The next step - aside from the cabinet work - will be to start removing the rust from the chassis. I think I'm procrastinating a bit on the actual electrical restoration. The underside of this thing is a lot more complicated than the AA5 and the Silvertone farm radio that I've previously recapped. Plus I will need to restuff the bakelite block capacitors and probably replace some resistors as well. I haven't decided yet if I want to try to make replicas of the dogbone resistors. I've seen some websites with details on how to do it, but it looks like a lot of work.

I'm afraid to use naval jelly on the chassis, because it's tough to get into the nooks & crannies without getting it into places I don't want it to go - like tube sockets. I started sanding with some 220 grit sandpaper, and the rust comes right off, so I think I may just do it that way.

Wednesday, March 22, 2006

Small steps

The title pretty much says it. Things are busy around the house, so I'm limited to a bit of time here & there to work on the radios. Priority #1 is the Philco. I really want to keep working on it steadily, making good if slow progress. So most of what I've been doing is shopping for all of the stuff I need. Chemicals, more clamps (you can never have enough of those), etc.

So I figured that before I do anything more with trying to put the cabinet back together, I really ought to strip the finish and see how bad it really is. So I picked up some Formsby's Refinisher. This is not really a true stripper. A regular stripper will remove everything. Shellac, lacquer, stain, etc. It takes you down to bare wood (well, it's supposed to, anyhow). I wasn't so sure that's what I want. Someone on ARF (see the link to the right) recommended using a "furniture refinisher" rather than a stripper, so that's what I got.

I have to say that I'm very pleased with the results. It took about an hour and a half, but I stripped the whole outer front, as well as the base moldings. The wood - particularly on the moldings and the lower columns, is pretty worn in places, and as a result, they look a bit blotchy. But the Formsby's did take all of the old finish off, and I must say I'm really happy with the way the veneer on the arch came out. I was dithering about whether to replace it all, or just try to patch the bad spots. I think I've now decided to try to preserve the original veneer as much as possible. The grain just looks so nice now. My biggest concern now is how I am going to match the old veneer.

Here's what it looks like now:


My first thought was to see if I can salvage some veneer from the back part of the case. I stripped a small area of it, and while it does look nice, it doesn't look like a very good match. So I guess I'm going to have to figure out where to get some of this veneer. One place I need to look at is the backside of the arch. It looks like there's some kind of veneer over that, so maybe I can steal a large enough piece to use as a patch - if it matches.

Here's what the veneer looks like from the top/side part of the case:


Sorry for the picture quality. It's hard shooting this stuff with a flash, but since I get most of my work done after 10:00PM, I don't have much choice. Anyhow, as you can see, this veneer is much redder than the front arch. At least it is after removing the old finish.

I know I don't need to get too concerned about the condition of the wood - after all, the reason the original manufacturers used toning lacquer was for that very reason - to hide the differences between the various kinds of (cheap) woods they used. But for certain parts, I do think I need to take some care to match the grain and the color as best I can.

I still have to figure out what I'm doing with the top/side (I think I'm going to try a stain, and see if that looks good enough. Otherwise I'll need to get some veneer) and the inner front. The inner front, with the scrollwork, is likely going to have to be re-veneered. It just took too much water damage, and has warped and shrunk a bit, so that the seams have split apart. I really want to just start over here.

So that's the status. I guess the next step is to go over it all one more time to make sure the old finish is completely gone from all of the nooks & crannies, then I need to move on to the veneer repair/replacement. I picked up some naval jelly too, so in my spare time (yeah, right) I can get started removing the rust from the chassis.

Sunday, March 12, 2006

Cabinet success

Well, I was able to get out to the garage for a bit of work on the Philco 70 today - no mean feat, with all of the other stuff that goes on around here. The goal for today was to see if I could separate the arch from the front of the cabinet. The arch is actually set into a groove, so this is a tricky project. I was advised to knock out the glue blocks, and use wet rags & an iron, to produce steam.

Knocking the glue blocks out turned out to be a lot more difficult than expected. I had to steam them for quite a while, and even then, I took a chunk of the front out when prying the blocks off with a chisel. After a LOT of steaming, I finally got the arch out of the groove. In the process, the layers on the back of the front (how do you like that description?) started to come apart from all of the steam. So I put some glue on a thin piece of wood, and worked it underneath, clamped it for a couple of hours, and that took care of that. I did lose a bit of veneer on the outer rear of the front, but I'll just have to deal with that later.

Here's what I've got now:


You can see that the veneer on the front is damaged - I did that the other day. I'm not sure if I should be upset about that, since it was pretty bad to begin with, so I'm kind of assuming that I will be re-veneering pretty much everything. While the veneer on the old arch is pretty sad, I do plan to save it in case it will come in handy later.

You might notice some splotches on the arch. That's where I was playing a bit with the finish. It's still old & cracking, but I thought I'd see what happens if I clean it up and use some Restor-A-Finish. It definitely helps, but it's far from a complete restoration of an old finish. Maybe another coat or 2 might help, but I'm just playing right now.

I experimented a bit with the new flexible plywood, to see if it will fit in the groove. While the old arch looks like it had the veneer glued on first, and was then glued into the groove, the new plywood looks like it will barely fit, before any veneer. In fact, I may have to widen the groove a bit, or shave down the edge, to make it fit. I figure that by putting the veneer on afterwards, it might help with the rigidity. The only problem is that I think I'm going to need a lot more clamps to do this job.

So I think I will have a bit of a challenge ahead, getting the new arch into place. But before I do that, I need to trace the outline, so that I can make up a new rear arch support. I also plan to start stripping the old finish, and probably the veneer too, at least the stuff on the front. It really is in pretty sad shape, so I don't feel so terrible about taking away the originality.

I do plan to try to stick to the original veneers that were used, which as best I can tell, are mahogany for the arch, and walnut for the front. Then some toning lacquers to get the right coloring.

Earlier, I promised some pics of the chassis, so here you go:


To tell you the truth, I don't even know where to begin with this chassis. There looks like so much work to do. On the one hand, it's tempting to do what I'm doing with the cabinet, and just tear it down to its pieces, and rebuild it step by step. Unfortunately, I don't have any confidence that I would be able to put it back together properly. So it seems like I'll have to just do it a bit at a time, pulling off only as much at one time as I think I can remember how to reassemble.

There's so much rust here that I will need to attack. The chassis, the condenser cans, and worst of all the variable capacitor. Well, I recall one person on the ARF who said that he likes to restore the cabinet first, because then it will sit there, telling you "hey, what are you waiting for? Get that chassis finished and installed already!". That may be the way to go here. I'm trying not to bite off more than I can chew. I already know that this is going to be a very long project, with many periods of time where nothing gets done. So I try not to start something that I know I'm not going to be able to finish. Eventually I'll get there. It may take a long time, and may not look like a professional restoration, but I do hope that I'll be happy with the result.

Friday, March 10, 2006

Taking a step back

I guess I jumped right in with the post about the Philco 70, and neglected to mention some of the other stuff I've been up to. So I figured it would be nice to mention some of the other radios that I've been playing with.

I've been DXing for a while, and originally I went to some swap meets looking for radios to dismantle, so that I could take the variable caps to use for antenna projects. I never did get around to the antenna projects, so after dismantling 2 dead radios, I was left with a Packard Bell 621 clock radio. I had paid $8 at the swap meet, and it actually worked. So it sat in the garage for a couple of years. Occasionally I'd turn it on, and it worked, though not well. A couple of months ago I was listening to it, when it suddenly went dead. I'd learned enough by then to figure that the problem was likely the old capacitors.

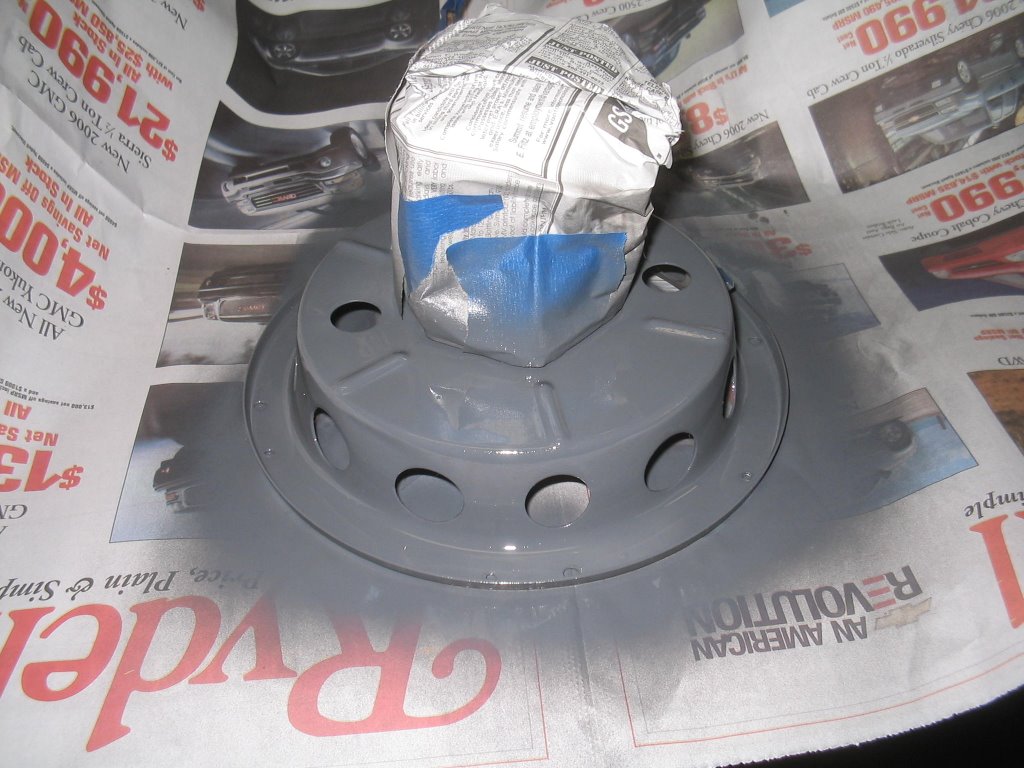
When I decided I wanted to get into old radios (30's & 40's radios are what I really like), I figured that the Packard Bell might be a good candidate for surgery practice. So I got the schematics, did a lot of reading, and purchased the parts to do a re-cap. This revived the radio from the dead. Unfortunately, the ferrite bar antenna wires are super thin, and kept breaking, so I still have to work on that. The speaker sounded awful, so I picked up a replacement at Fry's, built a mounting bracket, and got that working too. One of these days I'll finish it off, and see if I can get anything for it on eBay.

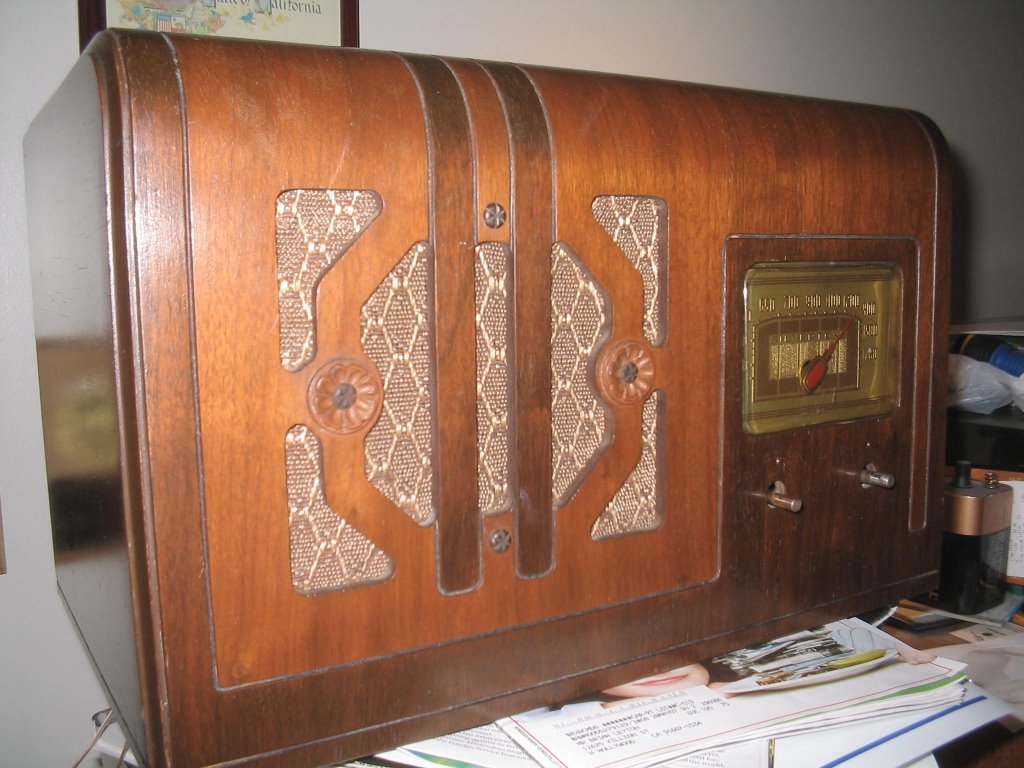
I did buy another radio on eBay. I paid about $47 for a Silvertone 2441 (that's with the shipping charges). You could see from the auction pics that it was in pretty good shape, so I went for it. Here's what it looked like when I first got it:


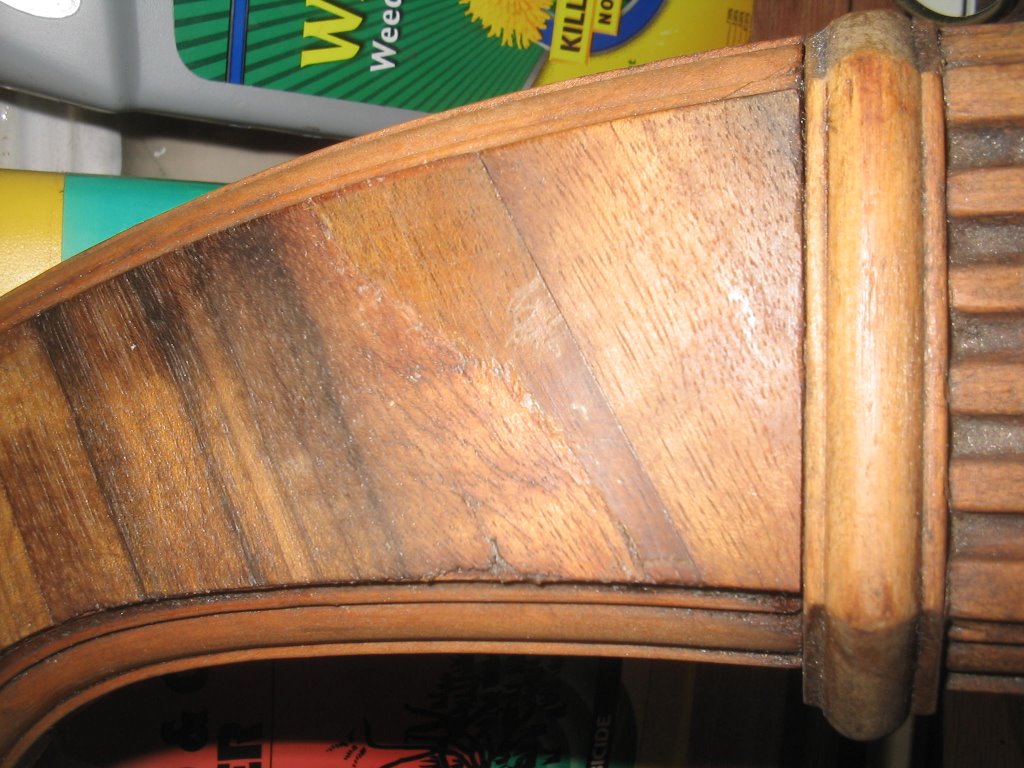
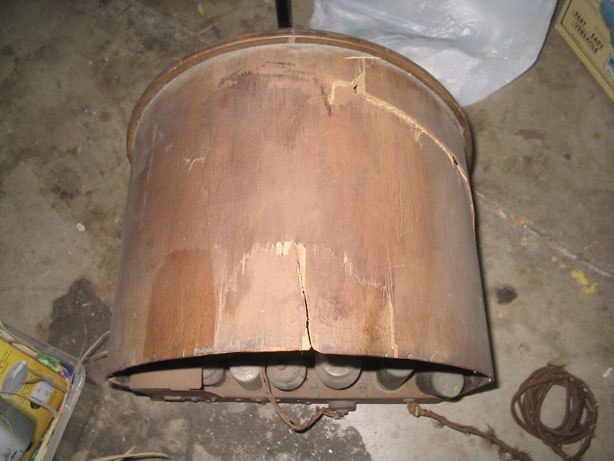
Pretty nice, but the cabinet was dirty, the dial cover needed some help, and of course it needed a re-cap. So I took it apart, cleaned the cabinet with naphtha, went over it with some Howard's Restore-a-Finish, and waxed it. I don't think the pictures really do it justice, but here's the cabinet when I was done:


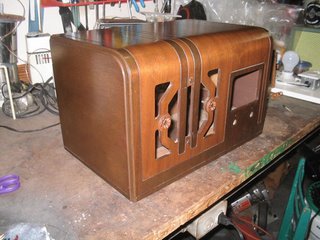
And here's what it looks like fully assembled again:


I'm sure that if I stripped it and refinished it, and made a new dial cover it could look like new, but then it wouldn't be original. Not that I'm a zealot about such things, but since this radio was in such good shape to begin with, it just seems like it would be a shame to take off the original finish. Maybe I'll find another basket case to practice on before I do the Philco 70.

As for the electronics, this is a farm radio, so that means that it is made to run off of 2 different battery voltages (90v and 1.5v). 1.5 isn't too hard to come by, but 90v batteries are expensive if you can find them. So with the assistance of Mike T., I built battery packs, and made up a connector for the radio to plug into. The 1.5v is supplied by 2 D-cells (in parallel - I had to wire this up myself, because the typical battery packs connect the batteries in series). Actually one D-cell would be enough, but wouldn't last very long. The 90v is supplied by 10 9v batteries snapped together in series. Amazingly enough, this works well, though I'm not getting much life from .99 cent store batteries.

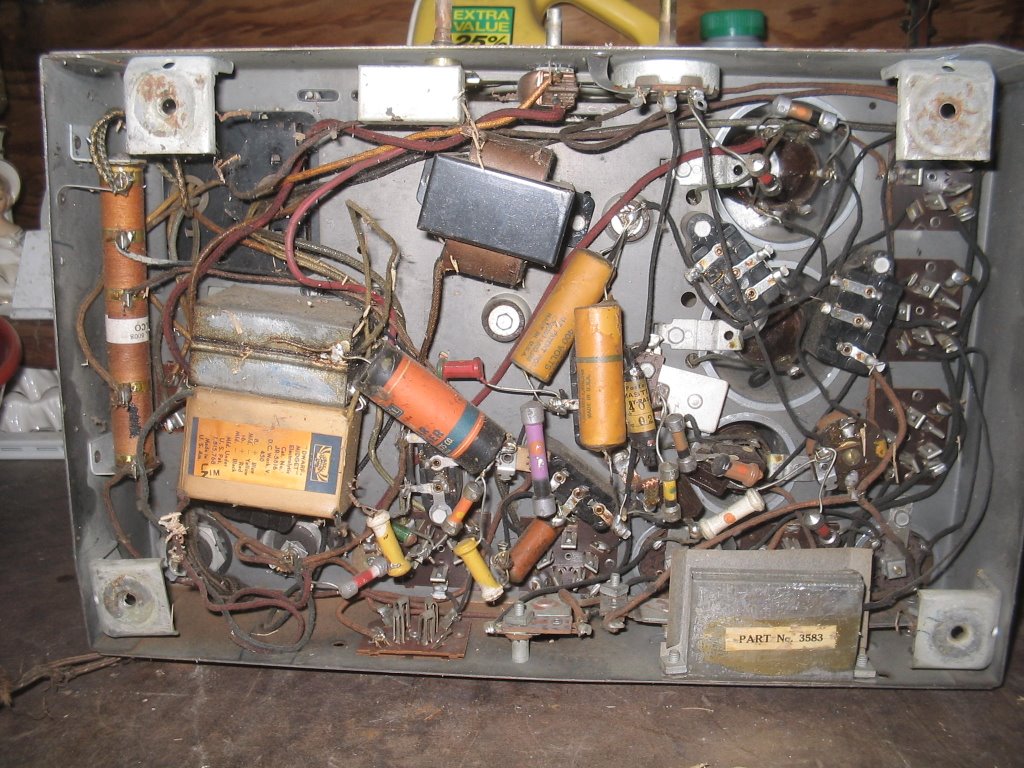
The recap was pretty easy, and while the radio did work before the recap, I'm always amazed when something still works after I'm done with it. And it did work. Not real well, but it did pick up a couple of locals. It was about this time that I discovered the importance of the antenna. The radio was completely dead without one, but with a 10' wire, at least I could pick up my local (50Kw daytime / 20Kw night, 1/2 block away!).

As it turned out, there were still a couple of things I needed to do to get this thing working well. The first was to do an alignment. Mike sold me a signal generator pretty cheaply, and gave me a 5 minute lesson on how to do an alignment. I went through the procedure 4 times before I was satisfied that I had done the best I could. But until I discovered the last piece of the puzzle, I wasn't happy yet.

I brought the radio into the house, hooked up some wire, and picked up a couple of stations. Not good. I then connected the antenna wire to a spare wire from the phone jack. MUCH better. In fact, I discovered that if I touch the shafts of the tuner or volume control, the signal gets even better. Not wanting to hold on to the radio all the time, I asked around on the Antique Radio Forum (ARF), and found that a ground is very important for these radios. After connecting a wire from the chassis to a screw on the outlet faceplate, the radio really came to life.

It still seemed like there was a lot of static at the low end of the band though. I puzzled over this for a while (that's when I did the last of the 4 alignments), and finally it dawned on me that my DSL is connected to the other pair of wires in the phone jack. I turned off the DSL modem, and voila! The radio worked great, across the entire band.

It still works well, even with the DSL on, for listening to KKGO, which is the "nostalgia" station around here. It's really the best station for listening to on a 1940's radio, though it leaves something to be desired.

I ordered an AM transmitter kit from Goldmine Electronics. I went to put it together, and discovered that it was missing the ferrite-bar antenna. Bummer. I called them, and they're sending me a replacement. I hope it comes soon. I've already downloaded a whole CD worth of old radio programs, that I can play through the transmitter.

Anyhow, the Silvertone is pretty much finished. I just need to find some knobs, and it'll be complete.

Another project in the pipeline is the RCA clock radio that belonged to my wife:


This is a pretty standard All American 5 (AA5) design, but with a selenium rectifier. I haven't decided whether to replace it with a diode & resistor or not. This one is not much of a rush project for me, but it's in pretty good shape, so once I clean up the decades of grunge, it should look pretty nice, even if it won't be worth much. My wife thinks that the clock may not work anymore. I'll have to have a look at that, but in the meantime, I haven't even plugged this one in yet.

Which brings me to another point. These old AA5 radios can be dangerous to work on., because the plugs are not polarized, and you have a 50/50 chance that the chassis will be hot with 120v AC. So I built a combination dim-bulb tester / isolation transformer, using 2 120/24 transformers back to back. It works well, and gives me some peace of mind.

One for the "honorable mention" list is an old Montgomery Ward AA5 that I got for $5. It's kind of ugly, and apparently the antenna is missing the ferrite bar, so I don't know if it will pick anything up. It does power up though, so this might be a parts radio, or I might wind up fixing it. We'll see.

Another radio on the list is the Braun TS2:


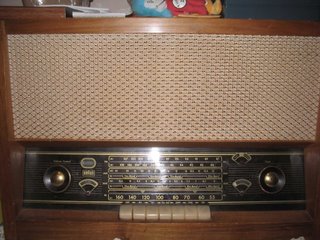
This is a nice, typical 50's German table radio. It belonged to my Mother-In-Law, who bought it new at Macy's when she lived in New York. When it still worked, it was a really nice sounding radio. Unfortunately, at some point the radio was left on (probably by me) at low volume for several weeks, and it no longer works. I plan to re-cap this one to see if that is the problem. It certainly can't hurt to replace the caps on a 50 year-old radio (well, at least if I don't manage to screw it up).

By the way, this radio is missing the knobs for bass/treble and the antenna adjuster (this just spins the ferrite antenna around inside the cabinet, to peak the signal). If you know where I can get the right knobs for this thing, please let me know.

The last radio on the list is a Telefunken console stereo that belonged to my grandmother. This is the radio that really got me into radio in the first place. It has SW, LW, AM & FM. It also has a turntable. My grandmother passed away in 1974, and this radio has resided in my mom's garage since we moved in 1978. I used to listen to it occasionally if I was in the garage, but it probably hasn't been turned on in 15 years. At on point, I replaced the turntable with a BSR, which worked really well, but I later gave the BSR to a friend, so I dropped the original turntable back in place, but didn't hook it back up. It's unfortunate that we don't have a place for this radio, because it was a really nice one. I don't expect to work on it any time soon.

So that's the list. Your comments are welcome.

Thursday, March 09, 2006

Philco 70 project begins

Well, I decided to get into restoring old radios, and I've now hit the big time. I just purchased a Philco 70 cathedral from Mike T., and it's going to need a LOT of work.

There's a lot of water damage to the veneer on the front, and that missing piece of veneer on the scrollwork, but that's the least of it...


So let's tally up what we've got. The front is damaged but probably needs all new veneer. The arch is completely shot, needs to be replaced, along with new veneer. Back arch support is missing, needs to be purchased or fabricated. And the chassis is very rusty. You'll see pics of this later, but trust me. The variable capacitor has rust on every plate. The rubber grommets are all shot. This thing needs to be torn down & rebuilt. But the tubes look good :-) And for the most part, it is complete - one knob looks home-made, but I'm not sure if that's because that's what it is, or if it somehow got damaged.

So I bought this thing on 2/21/06, and so far I've managed to dismantle most of the cabinet. I need to get the arch separated from the front, which I'm told can be done with an iron on a wet towel, to generate steam.

It took me a while to figure out how to replace the arch. I finally discovered that there is such a thing as flexible plywood. Most of the time you buy plywood because you want it to be rigid, so I guess this is somewhat unusual. But finding a piece locally looked like it was going to be difficult, so I found that Van Dykes Restorers has the stuff in small sizes, and it was pretty reasonable. So I purchased a 1'x4' piece, and it arrived on 3/8/06. It looks like it will do the job. I had hoped that the plain poplar wood might be a decent replacement for the mahogany veneer that was original on this radio, but it looks almost like balsa - very lightweight and rough.

So now I have to find some veneer. The original plan was a single piece to cover the entire arch. That might be difficult, because on this radio, the grain runs from front to back, while most narrow veneer is cut in such a way that the grain runs the long way. Since I need a piece 4' long, this won't work, unless I get a 4'x8' sheet, which is really expensive.

I was looking at the radio though, and it looks like it was put together with 3 separate pieces of veneer - one on each side, and one over the top of the arch. So I suppose that if I do it that way, it will still be "original", though I'm still somewhat concerned about my ability to hide the seam.